
Notice
Recent Posts
Recent Comments
Link
| 일 | 월 | 화 | 수 | 목 | 금 | 토 |
|---|---|---|---|---|---|---|
| 1 | 2 | 3 | ||||
| 4 | 5 | 6 | 7 | 8 | 9 | 10 |
| 11 | 12 | 13 | 14 | 15 | 16 | 17 |
| 18 | 19 | 20 | 21 | 22 | 23 | 24 |
| 25 | 26 | 27 | 28 | 29 | 30 | 31 |
Tags
- 제로베이스
- 자격증
- Do it! 시리즈
- 구름edu
- 개발자북클럽
- 공부를 가장한 일기일지도
- 노마드코더
- 모던 자바스크립트 deep dive
- 톺아보기
- SQLD
- 알고리즘
- SQL 개발자
- nomadcoders
- js
- IT 지식
- 비전공자를 위한
- 이해할 수 있는
- 오블완
- javascript
- 노개북
- 프로그래머스
- K-Digital Credit
- boj
- 최원영 저자
- 티스토리챌린지
- 백준
- 엘리스코딩
- 자바스크립트
- CodeStates
- 노마드 코더
Archives
- Today
- Total
개발자를 희망하는 초보의 자기개발 이야기
[혼공스] 6주차 Chapter 07 문서 객체 모델 본문
반응형
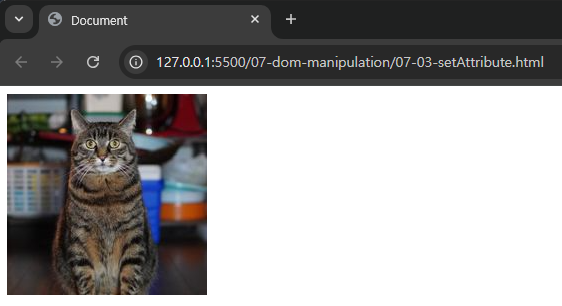
기본 미션
p. 315의 <직접 해보는 손코딩>을 실행한 후 출력되는 고양이 이미지 캡처하기
- 사이트가 https://www.placecats.com으로 변경되었음.
<head>
  <script>
    document.addEventListener("DOMContentLoaded", () => {
      const img = document.querySelector("img");
      img.setAttribute("src", "https://www.placecats.com/200/200");
      img.src = "https://www.placecats.com/200/200";

      console.log(img.getAttribute("src"));
      console.log(img.src);
    });
  </script>
</head>
<body>
  <img src="" alt="" />
</body>
선택미션
p. 352 누적 예제를 활용하여 본인의 할 일 목록을 만들어 캡처하기

<head>
  <script>
    document.addEventListener("DOMContentLoaded", () => {
      const addTodo = () => {
        if (input.value !== "") {
          const div = document.createElement("div");
          document.body.appendChild(div);

          const checkbox = document.createElement("input");
          checkbox.type = "checkbox";
          checkbox.addEventListener("change", () => {
            if (checkbox.checked) {
              div.style.textDecoration = "line-through";
            } else {
              div.style.textDecoration = "";
            }
          });
          div.appendChild(checkbox);

          const span = document.createElement("span");
          span.textContent = input.value;
          input.value = "";
          div.appendChild(span);

          const deleteButton = document.createElement("button");
          deleteButton.textContent = "제거하기";
          deleteButton.addEventListener("click", () => {
            div.parentNode.removeChild(div);
          });
          div.appendChild(deleteButton);
        }
      };

      const h1 = document.createElement("h1");
      h1.textContent = "할 일 목록";
      document.body.appendChild(h1);
      const input = document.createElement("input");
      input.addEventListener("keyup", (e) => {
        if (e.keyCode === 13) {
          addTodo();
        }
      });
      document.body.appendChild(input);

      const addButton = document.createElement("button");
      addButton.textContent = "추가하기";
      document.body.appendChild(addButton);
      addButton.addEventListener("click", addTodo);
    });
  </script>
</head>
<body></body>
학습 기록
문서 객체 모델
- 문서 객체 모델(Document Object Model), 줄여서 DOM이라고 부른다.
- 문서 객체는 HTML 요소를 의미한다.
- 문서 객체 모델은 자바스크립트를 통해 HTML 요소를 조작할 수 있게 해주는 객체들의 집합이다.
DOMContentLoaded
- html에서 <script>가 실행될 때 DOM이 아직 만들어지지 않은 경우를 방지한다.
- head 내에 script 태그를 넣고 싶을 때 사용하며, body 태그 내 문서 가장 하단에 script를 배치하면 필요치 않다.
<head>
  <script>
    document.addEventListener("DOMContentLoaded", ()=>{
      console.log("안녕하세요")
    })
  </script>
</head>
<body>
  <script>
    console.log("안녕하세요")
  </script>
</body>
querySelector()
- document 객체를 통해 HTML 문서 내의 태그에 접근할 수 있다.
- querySelector()는 해당 조건에 맞는 첫 번째 태그만 선택한다.
- 다양한 선택자를 태그로 선택할 수 있다.
<head>
  <script>
    document.querySelector("h1").style.color = "red"; // 태그 선택자
    document.querySelector("#header").style.backgroundColor = "orange"; // 아이디 선택자
    document.querySelector(".center.head").style.textAlign = "center"; // 클래스 선택자
    document.querySelector("[type=text]").style.borderRadius = "10px"; // 속성 선택자
    document.querySelector("body input").style.backgroundColor = "blue"; // 후손 선택자
  </script>
</head>
<body>
  <h1 id="header" class="center head">안녕하세요!</h1>
  <input type="text">
</body>
querySelectorAll()
- querySelectorAll()은 해당 조건의 모든 태그를 선택한다.
- querySelectorAll()의 결과는 NodeList라는 유사 배열(Iterable) 객체다.
- NodeList 자체는 HTML 요소들의 리스트이지만, style 속성은 개별 요소(HTMLElement)에만 적용할 수 있다.
- 따라서 각 요소를 순회하면서 적용해야 한다. 이 때 반복문을 활용한다.
<head>
  <script>
  document.addEventListener("DOMContentLoaded", () => {
      for (const el of document.querySelectorAll("input")) {
        el.style.backgroundColor = "red";
      }
    });
  </script>
</head>
<body>
  <h1 id="header" class="center head">안녕하세요!</h1>
  <input type="text" />
  <input type="" />
</body>
textContent / innerHTML
- textContent는 값을 모두 문자로 인식한다.
- innerHTML은 값 내의 태그를 HTML로 인식한다.
- 따라서 innerHTML은 보안상 문제가 될 수 있기 때문에 가급적 textContent를 사용한다.
<head>
  <script>
    document.addEventListener("DOMContentLoaded", () => {
      const header1 = document.querySelector("#textContent");
      const header2 = document.querySelector("#innerHTML");

      header1.textContent = "바뀐 문자열<br>입니다.";
      header2.innerHTML = "바뀐 문자열<br>입니다.";
    });
  </script>
</head>
<body>
  <h1 id="textContent">textContent 속성 기존 문자열</h1>
  <h1 id="innerHTML">innerHTML 속성 기존 문자열</h1>
</body>
setAttribute / getAttribute
- 값 넣기: element.setAttribute("속성명", "값")
- 값 추출: element.getAttribute("속성명")
- 표준 속성(src, alt 등)은 점(.)으로 바로 접근 가능하다.
- 사용자 정의 속성을 조작할 때 해당 메서드를 활용한다.
<head>
  <script>
    document.addEventListener("DOMContentLoaded", () => {
      const img = document.querySelector("img");
      img.setAttribute("src", "https://www.placecats.com/200/200");
      img.src = "https://www.placecats.com/200/200";

      console.log(img.getAttribute("src"));
      console.log(img.src);
    });
  </script>
</head>
<body>
  <img src="" alt="" />
</body>
스타일 조작
- element.style.속성 = "값"
- 자바스크립트에서는 CSS 속성명의 대시(-)를 대문자로 표현한다.
- 또는 객체 속성으로 접근하는 방식도 사용 가능은 하다.(권장하지 않음)
- 단위를 꼭 같이 표기해야 한다. (ex. height: "10px")
<head>
  <script>
    document.addEventListener("DOMContentLoaded", () => {
      const divs = document.querySelectorAll("div");

      divs.forEach((div, key) => {
        div.style.backgroundColor = `rgb(${key * 25.5},${key * 25.5},${
          key * 25.5
        })`;
        div.style.height = "10px";
      });
    });
  </script>
</head>
<body>
  <div></div>
  <div></div>
  <div></div>
  <div></div>
  <div></div>
  <div></div>
  <div></div>
  <div></div>
  <div></div>
  <div></div>
</body>
문서 객체 생성, 제거, 이동
문서 객체 생성하기
- createElement()
- 첫 번째 매개변수에 태그 이름을 입력하여 원하는 태그를 생성할 수 있다.
- 생성된 태그 객체를 변수에 저장하면 내부 텍스트, 스타일, 속성 등을 수정할 수 있다.
- 단, 이 단계는 생성만 한 것이기 때문에 화면에 출력되지 않는다.
document.addEventListener("DOMContentLoaded", () => {
  const header = document.createElement("h1");

  header.textContent = "createElement로 만든 태그입니다.";
  header.style.backgroundColor = "black";
  header.style.color = "white";
});
문서 객체 붙이기
- appendChild()
- 생성된 문서 객체를 화면에 출력할 때 태그를 지정해 자식으로 붙인다.
document.addEventListener("DOMContentLoaded", () => {
  const header = document.createElement("h1");

  header.textContent = "createElement로 만든 태그입니다.";
  header.style.backgroundColor = "black";
  header.style.color = "white";

  const body = document.querySelector("body");
  body.appendChild(header);
});
문서 객체 제거하기
- removeChild()
- 부모 노드(parentNode)를 사용하면 요소만으로 removeChild() 메서드를 호출하여 노드를 제거할 수 있어 더 편하다.
const header = document.createElement("h1");

header.textContent = "createElement로 만든 태그입니다.";
header.style.backgroundColor = "black";
header.style.color = "white";

const body = document.querySelector("body");
body.appendChild(header);
setTimeout(() => {
  body.removeChild(header); // header의 위치가 바뀌면 새로운 위치를 지정해야 함.
  header.parentNode(header); // 항상 header의 부모 노드에서 제거함
}, 2000);
문서 객체 이동하기
- appendChild()
- 출력하는 메서드이나 다른 위치를 지정해 출력하면 복사가 아니라 이동한다.
<head>
  <script>
    document.addEventListener("DOMContentLoaded", () => {
      const header = document.createElement("h2");
      const first = document.querySelector(".first");
      const second = document.querySelector(".second");

      header.textContent = "안녕하세요";

      first.appendChild(header);

      setTimeout(() => {
        second.appendChild(header);
      }, 2000);
    });
  </script>
</head>
<body>
  <div class="first">
    <h1>첫 번째 div 태그 내부</h1>
  </div>
  <div class="second">
    <h1>두 번째 div 태그 내부</h1>
  </div>
</body>
이벤트 핸들링
이벤트 연결하기
- addEventListener()
- 첫 번째 인자에 이벤트 이름, 두 번째 인자에 이벤트 발생 시 호출할 함수를 지정한다.
- 아래 코드의 경우 텍스트를 클릭시 클릭 횟수가 증가한다.
- 이 때 텍스트가 불필요하게 선택되는데 userSelect를 none으로 설정하면 이 기능을 없앨 수 있다.
const header = document.createElement("h1");
document.body.appendChild(header);

let count = 0;
header.style.userSelect = "none";
header.textContent = `클릭 횟수 : ${count}회`;

header.addEventListener("click", () => {
  header.textContent = `클릭 횟수 : ${++count}회`;
});
이벤트 제거하기
- removeEventListener()
- 제거할 때는 addEventListener에서 사용한 것과 동일한 함수를 매개변수로 전달한다.
- 이를 위해 일반적으로 함수를 별도의 변수에 저장한다.
let counter = 0;

// 이벤트 중복연결을 막아줄 조건 설정
let isConnect = false;

const listener = () => {
  header.textContent = `클릭 횟수 : ${++counter}회`;
};

const header = document.createElement("h1");
header.textContent = "클릭 횟수 : 0회";

const p = document.createElement("p");
p.textContent = "이벤트 연결 상태: 해제";

const connectButton = document.createElement("button");
connectButton.textContent = "이벤트 연결";
connectButton.addEventListener("click", () => {
  if (isConnect === false) {
    header.addEventListener("click", listener);
    p.textContent = "이벤트 연결 상태: 연결";
    isConnect = true
  }
});

const disconnectButton = document.createElement("button");
disconnectButton.textContent = "이벤트 해제";
disconnectButton.addEventListener("click", () => {
  header.removeEventListener("click", listener);
  p.textContent = "이벤트 연결 상태: 해제";
});

document.body.appendChild(header);
document.body.appendChild(connectButton);
document.body.appendChild(disconnectButton);
document.body.appendChild(p);
이벤트 활용
키보드 이벤트
- keyup / keypress / keydown
- 키보드 입력 상황별 이벤트다.
- keypress는 브라우저에 따라 아시아권의 문자를 제대로 처리하지 못하는 문제가 있어 잘 사용하지 않는다.
document.addEventListener("keyup", () => {
  document.body.innerHTML = "<h1>keyup 이벤트 발생</h1>";
});

document.addEventListener("keydown", () => {
  document.body.innerHTML = "<h1>keydown 이벤트 발생</h1>";
});
이벤트 객체
- 이벤트가 발생하면 이벤트 함수의 첫번째 매개변수로 이벤트 객체가 전달된다.
- 이 객체에는 이벤트 관련 정보가 포함되어 있어 다양하게 활용할 수 있다.
document.addEventListener("keyup", (e) => {
  document.body.innerHTML = `<h1>${e.code} 이벤트 발생</h1>`;
});

document.addEventListener("keydown", (e) => {
  document.body.innerHTML = `<h1>${e.code} 이벤트 발생</h1>`;
});
이벤트 발생 객체
- 아래의 코드는 textarea태그에 이벤트를 연결했다. 이 때 textarea는 이벤트 발생 객체가 된다.
- 이를 참조하는 다양한 방식이 있다.
- 대표적으로 currentTarget을 통해 이벤트 발생 객체를 참조하는 방식이 있다.
const h1 = document.querySelector("h1");
const textarea = document.querySelector("textarea");
textarea.addEventListener("keyup", () => {
  h1.textContent = `글자 수 : ${textarea.value.length}`;
});

textarea.addEventListener("keyup", (e) => {
  h1.textContent = `글자 수 : ${e.currentTarget.value.length}`;
});- 화살표 함수가 아닌 익명함수를 사용해 this를 참조할 수도 있다.
const h1 = document.querySelector("h1");
const textarea = document.querySelector("textarea");
textarea.addEventListener("keyup", () => {
  h1.textContent = `글자 수 : ${textarea.value.length}`;
});

textarea.addEventListener("keyup", function () {
  h1.textContent = `글자 수 : ${this.value.length}`;
});
기본 이벤트 막기
- preventDefault()
- 태그의 기본 동작을 막을 수 있다.
- 예를 들어 a 태그를 눌러도 링크로 이동하지 않거나
- 텍스트 위에서 마우스 오른쪽 버튼을 눌러도 contextmenu가 나오지 않게 처리할 수 있다.
<head>
  <script>
    document.addEventListener("DOMContentLoaded", () => {
      const a = document.querySelector("a");
      a.addEventListener("click", (e) => {
        e.preventDefault();
      });
      a.addEventListener("contextmenu", (e) => {
        e.preventDefault();
      });
    });
  </script>
</head>
<body>
  <a href="http://naver.com/">네이버</a>
</body>
입력 양식 버튼
버튼 관련 태그
- button, input 태그 중 type="button", type="submit"
- 이 세 가지 태그 모두 버튼 기능을 한다.
- click 이벤트를 활용한다.
<head>
  <script>
    document.addEventListener("DOMContentLoaded", () => {
      const buttonA = document.querySelector("button");
      const buttonB = document.querySelector("input[type=button]");

      buttonA.addEventListener("click", (event) => {
        event.currentTarget.textContent += "글자";
      });

      buttonB.addEventListener("click", (event) => {
        event.currentTarget.value += "글자";
      });
    });
  </script>
</head>
<body>
  <!-- click 이벤트 활용 -->
  <button>버튼</button>
  <input type="button" value="input 버튼" />
</body>- submit 이벤트는 form 태그에 연결해야 한다.
- 그래서 click 이벤트와는 달리 submit 이벤트를 따로 활용한다.
- submit 이벤트 핸들러에서 이메일 형식 검사 등의 유효성 검증 로직을 구현할 수 있다.
- 이메일 형식이 잘못된 경우 preventDefault()를 사용하여 form 제출을 막을 수 있다.
<head>
  <script>
    document.addEventListener("DOMContentLoaded", () => {
      const form = document.querySelector("form");
      form.addEventListener("submit", (e) => {
        const text = document.querySelector("input[type=text]");
        if (text.value.indexOf("@") >= 0) {
          alert("정상적으로 제출합니다!");
        } else {
          alert("이메일 형식을 입력해주세요");
          e.preventDefault();
        }
      });
    });
  </script>
</head>
<body>
  <!-- submit 이벤트 활용 -->
  <form action="">
    <label for="submit">이메일 형식을 입력해주세요</label>
    <br />
    <input id="submit" type="text" />
    <input type="submit" value="제출" />
  </form>
</body>- 추가로 form 태그 내 button 태그는 submit 이벤트를 발생시킨다.
- 따라서 form 내부에서 button을 사용하고 싶을 때는 button태그가 아닌 input[type="button"]을 생성해야 한다.
입력 양식 글자 입력
key 이벤트를 사용한 출력
- input, text, textarea 등은 값을 가져올 때 value 속성을 사용한다.
- key 이벤트는 keydown -> keypress -> 입력양식에 값 추가 -> keyup 단계를 거친다.
- keydown과 keypress에 이벤트를 등록하면 실제 입력을 즉시 감지하지 못한다.
- 따라서 입력 값 추출을 위해서는 keyup 이벤트를 사용한다.
<head>
  <script>
    document.addEventListener("DOMContentLoaded", () => {
      const input = document.querySelector("input");
      const p = document.querySelector("p");

      input.addEventListener("keyup", () => {
        const inch = Number(input.value);

        // 숫자가 아닌 값을 판별
        if (isNaN(inch)) {
          p.textContent = "숫자를 입력해주세요";
          return;
        }

        p.textContent = `${inch * 2.54}cm로 변환되었습니다.`;
      });
    });
  </script>
</head>
<body>
  <input type="text" /> inch<br />
  <p></p>
</body>
change 이벤트를 사용한 출력
- input태그 전체의 입력을 마쳤을 때 발생한다.
- 즉, 입력 중에는 발생하지 않고 입력을 마치고 엔터를 쳤을 때나
- 입력 후 마우스로 input 이외에 다른 곳을 클릭하는 등 입력을 마쳤다는게 선언될 때 발생한다.
<head>
  <script>
    document.addEventListener("DOMContentLoaded", () => {
      const input = document.querySelector("input");
      const p = document.querySelector("p");

      input.addEventListener("change", () => {
        const inch = Number(input.value);

        // 숫자가 아닌 값을 판별
        if (isNaN(inch)) {
          p.textContent = "숫자를 입력해주세요";
          return;
        }

        p.textContent = `${inch * 2.54}cm로 변환되었습니다.`;
      });
    });
  </script>
</head>
<body>
  <input type="text" /> inch<br />
  <p></p>
</body>
윤쌤의 조언(1)
- 회원가입이나 로그인시 비밀번호나 휴대폰번호 등을 입력하는 상황에서
- onChange를 사용한다면 값을 다 입력한 다음 유효성 검증 결과를 출력한다.
- setTimeout 같은 타이머 함수를 이용하면 입력 중에 유효성 검증 결과를 출력한다.
- 즉, 어떤 방식의 사용자 경험을 제공할 것인지에 따라 다르게 구현하는 것으로 정답은 없다.
입력 양식 선택 상자
- 아래로 선택상자가 나온다고 하여 드롭다운 이라고도 부른다.
- html에서 공식 명칭은 select 선택 박스이다.
단일 선택 상자 사용하기
- select 태그를 생성하고 내부에 option 태그를 이용해 선택 옵션을 만든다.
- 선택 이벤트를 감지하기 위해 change 이벤트를 활용한다.
- 선택된 옵션의 정보(선택된 옵션의 텍스트, 선택된 옵션의 인덱스)를 가져와 화면에 출력한다.
- currentTarget.options 와 currentTarget.options.selectedIndex를 활용한다.
<head>
  <script>
    document.addEventListener("DOMContentLoaded", () => {
      const select = document.querySelector("select");
      const p = document.querySelector("p");

      select.addEventListener("change", (e) => {
        const options = e.currentTarget.options;
        const index = options.selectedIndex;
        p.textContent = `선택: ${options[index].textContent}`;
      });
    });
  </script>
</head>
<body>
  <select>
    <option>떡볶이</option>
    <option>순대</option>
    <option>오뎅</option>
    <option>튀김</option>
  </select>
  <p>선택: 떡볶이</p>
</body>
다중 선택 상자 사용하기
- 드롭다운에서 여러개를 선택할 수 있도록 하는 것을 말한다.
- 이를 위해 select 태그에 multiple 속성을 추가한다.
- 다중 선택 시 모든 선택된 옵션을 출력하는 로직
- options을 순회한다.
- selected된 option을 모두 배열에 담는다.
- join 메서드로 배열을 문자열로 바꿔 출력한다.
<head>
  <script>
    document.addEventListener("DOMContentLoaded", () => {
      const select = document.querySelector("select");
      const p = document.querySelector("p");

      select.addEventListener("change", (e) => {
        const options = e.currentTarget.options;
        const list = [];
        for (const option of options) {
          if (option.selected) {
            list.push(option.textContent);
          }
        }
        p.textContent = `선택: ${list.join(",")}`;
      });
    });
  </script>
</head>
<body>
  <select multiple>
    <option>떡볶이</option>
    <option>순대</option>
    <option>오뎅</option>
    <option>튀김</option>
  </select>
  <p>선택:</p>
</body>
입력 양식 체크박스와 라디오버튼
체크박스
- true/false 값을 나타내는 데 사용한다.
- 필수,선택 약관동의 등
- checked 속성으로 체크 상태를 확인해서 text를 변경한다.
<head>
  <script>
    document.addEventListener("DOMContentLoaded", () => {
      const checkbox = document.querySelector("input[type=checkbox]");
      const checkboxResult = document.querySelector("h1#checkbox");
      checkbox.addEventListener("change", () => {
        if (checkbox.checked) {
          checkboxResult.textContent = "체크";
        } else {
          checkboxResult.textContent = "해제";
        }
      });
    });
  </script>
</head>
<body>
  <!-- 어떤 대상의 true 또는 false -->
  <input type="checkbox" />
  <h1 id="checkbox"></h1>
</body>
라디오 버튼
과거방법1: undefined 체크 방식
- name 속성을 기준으로 여러 값을 묶어서 처리한다.
- 따라서 querySelectorAll을 사용하고, forEach 반복문을 통해 값을 순회해서 확인한다.
<head>
  <meta charset="UTF-8" />
  <meta name="viewport" content="width=device-width, initial-scale=1.0" />
  <title>Document</title>
  <script>
    document.addEventListener("DOMContentLoaded", () => {
      const radios = document.querySelectorAll(
        "input[type=radio][name=gender]"
      );
      const radioResult = document.querySelector("h1#radiobutton");
      radios.forEach((radio) => {
        radio.addEventListener("change", (e) => {
          e.currentTarget.value;
          radioResult.textContent = `${e.currentTarget.value} 버튼이 선택되었습니다.`;
        });
      });
    });
  </script>
</head>
<body>
  <!-- 여러 대상 중에서 하나를 선택 -->
  <input type="radio" name="gender" value="여성" />여성<br />
  <input type="radio" name="gender" value="남성" />남성<br />
  <input type="radio" name="gender" value="직접지정" />직접지정<br />
  <h1 id="radiobutton"></h1>
</body>
윤쌤의 조언(2)
- 다양한 앱을 사용하면서 '이건 어떻게 만들었을까' 생각해본다.
- 생각하다가 실제 코드를 보면 기억에 더 잘 남는다.
- 초기에는 코드 퀄리티보다 기능 구현에 초점을 맞추는 것이 중요하다.
- 구현된 코드가 있어야 최적화도 하고 유지보수도 한다.
localStorage 객체
로컬 스토리지 객체란?
- 브라우저에 데이터를 저장할 수 있는 로컬 저장소다.
- getItem, setItem, removeItem, clear 메서드를 제공한다.
- 간단한 애플리케이션에서 데이터 저장에 유용하다.
localStorage.getItem("키"); // 키로 값을 꺼낼 때
localStorage.setItem("키", "값"); // 키로 값을 저장할 떄
localStorage.removeItem("키"); // 키로 값을 제거할 떄
localStorage.clear(); // 전체 제거할 때
키 하나에 데이터 하나 저장하기
- 지우기 버튼 클릭 시 로컬 스토리지 데이터 초기화
- 입력 시 로컬 스토리지에 "key"라는 키로 값 저장
- 새로고침 시 로컬 스토리지에서 "key" 키 값을 읽어와 적용
<head>
  <script>
    document.addEventListener("DOMContentLoaded", () => {
      const p = document.querySelector("p");
      const button = document.querySelector("button");
      const input = document.querySelector("input");

      const key = localStorage.getItem("key");
      if (key !== null) {
        p.textContent = `이전 실행 때의 마지막 값: ${key}`;
      }
      input.value = key;

      button.addEventListener("click", () => {
        localStorage.clear();
      });

      input.addEventListener("input", () => {
        localStorage.setItem("key", input.value);
      });
    });
  </script>
</head>
<body>
  <p></p>
  <button>지우기</button>
  <input type="text" />
</body>
키 하나에 여러 데이터 저장하기
- 데이터를 저장할 때 키-값 쌍으로 저장하는데, 키가 많아지면 관리하기 복잡해질 수 있다.
- 그래서 하나의 키에다가 여러 데이터를 저장하는 방법을 많이 사용한다.
- 아래의 예시는 split(",")를 이용하기 때문에 입력값 자체에 ","가 포함되면 데이터가 제대로 저장되지 않는 문제가 있다.
<head>
  <script>
    const load = () => {
      const data = localStorage.getItem("애플리케이션");
      if (data !== null) {
        const [color, message] = data.split(",");
        return {
          color: color,
          message: message,
        };
      } else {
        return {
          color: "red",
          message: "",
        };
      }
    };
    const save = (data) => {
      localStorage.setItem("애플리케이션", `${data.color},${data.message}`);
    };

    document.addEventListener("DOMContentLoaded", () => {
      const p = document.querySelector("p");
      const button = document.querySelector("button");
      const input = document.querySelector("input");
      const select = document.querySelector("select");

      // 초기 실행
      const data = load();
      p.textContent = `이전 실행 때의 마지막 값: ${data.message}`;
      input.value = data.message;
      document.body.style.backgroundColor = data.color;
      select.value = data.color;

      // 이벤트 연결
      button.addEventListener("click", () => {
        // 데이터를 모두 지우고!
        data.color = "red";
        data.message = "";
        save(data);
        // 입력 양식 초기화!
        select.value = "red";
        input.value = "";
      });

      input.addEventListener("keyup", () => {
        data.message = input.value;
        save(data);
      });

      select.addEventListener("change", () => {
        const color = select.options[select.selectedIndex].value;
        // 입력 양식 반영
        document.body.style.backgroundColor = color;
        // 데이터를 저장
        data.color = color;
        save(data);
      });
    });
  </script>
</head>
<body>
  <p></p>
  <button>지우기</button>
  <input type="text" />
  <select name="" id="">
    <option value="red">빨간색</option>
    <option value="blue">파란색</option>
    <option value="green">초록색</option>
  </select>
</body>
JSON 객체
- 문제점을 해결하기 위해 JSON 객체를 사용한다.
- JSON은 JavaScript Object Notation의 약자로, 자바스크립트 객체를 문자열로 표현하는 데이터 형식이다.
- JSON 객체는 키-값 쌍으로 구성되며, 키는 반드시 문자열로 구성되고, 문자열은 큰따옴표로 감싸야한다.
- 자바스크립트에는 JSON 객체를 다루기 위한 두 가지 메서드가 있다:
- JSON.stringify(): 자바스크립트 객체를 JSON 문자열로 변환
- JSON.parse(): JSON 문자열을 자바스크립트 객체로 변환
- JSON 객체는 다양한 프로그래밍 언어에서 널리 사용되는 데이터 형식이므로, 이를 잘 활용하면 애플리케이션 간 데이터 호환성을 높일 수 있다.
- 기존 setItem시 ',' 를 통해 값을 구분지어 넣던 것을 JSON.stringify를 활용해 바로 저장할 수 있다
const save = (data) => {
  localStorage.setItem("애플리케이션", `${data.color}, ${data.message}`);
};

// JSON.stringify 적용
const save = (data) => {
  localStorage.setItem("애플리케이션", JSON.stringify(data));
};- 기존 로컬스토리지의 값을 split으로 구분해서 각각 변수로 설정했던 것은 JSON.parse로 간단하게 처리할 수 있다.
const [color, message] = data.split(",");
return {
  color: color,
  message: message,
};

// JSON.parse
return JSON.parse(data);
반응형
'혼공학습단 > 혼공자스' 카테고리의 다른 글
| 혼공학습단 13기 활동 회고 (0) | 2025.02.23 |
|---|---|
| [혼공스] 5주차 Chapter 06 객체 (0) | 2025.02.13 |
| [혼공스] 4주차 Chapter 05 함수 (0) | 2025.02.05 |
| [혼공스] 3주차 Chapter 04 반복문 (2) | 2025.02.04 |
| [혼공스] 2주차 Chapter 03 조건문 (0) | 2025.01.22 |
'혼공학습단/혼공자스' Related Articles
more


